| [pending review revision] | [pending review revision] |
(Page créée avec « Dénudage et nettoyage de la fibre ») |
(Page créée avec « A l'issue du rétreint, positionner le smoove sur le plateau de refroidissement avant de passer à la soudure d'autres fibres. Ensuite positionner les smooves dans la cass... ») |
||
| (18 intermediate revisions by the same user not shown) | |||
| Line 31: | Line 31: | ||
{{Tuto Step | {{Tuto Step | ||
|Step_Title=Dénudage et nettoyage de la fibre | |Step_Title=Dénudage et nettoyage de la fibre | ||
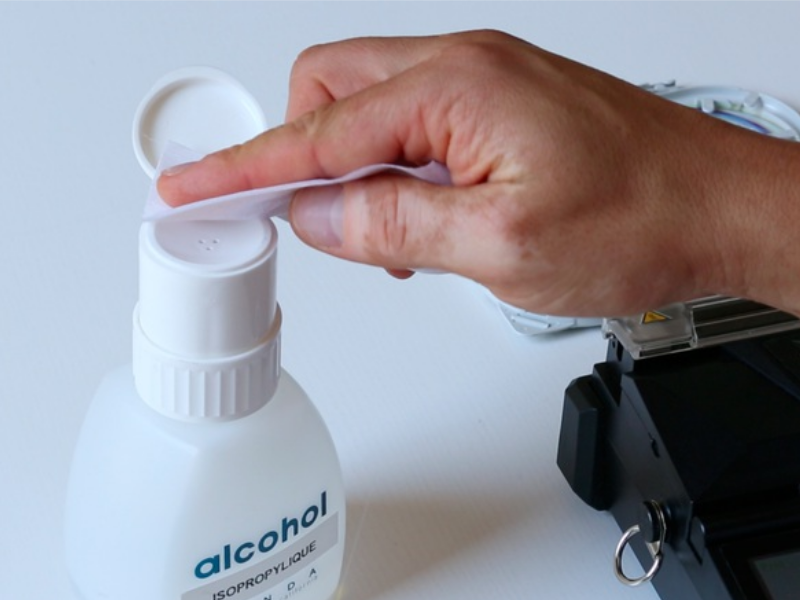
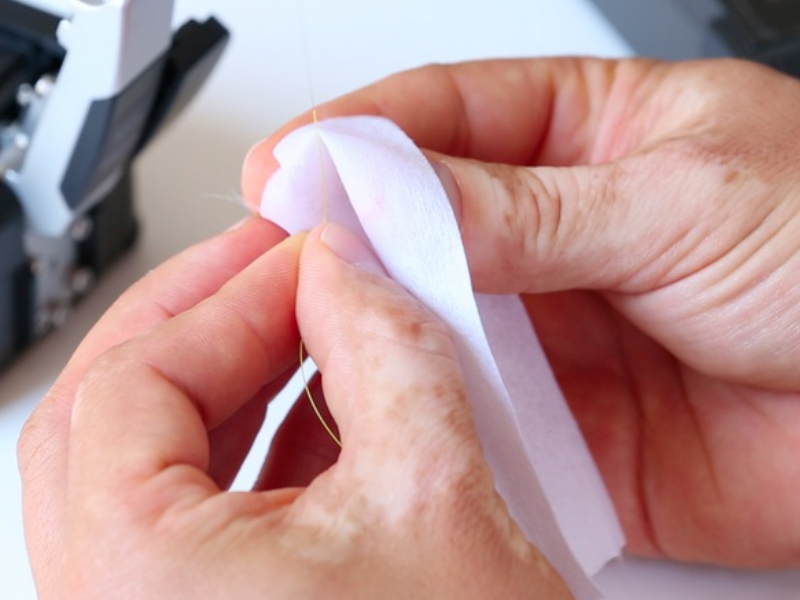
| − | |Step_Content= | + | |Step_Content=Dénuder sur 3/4 cm, nettoyer la fibre dénudée avec l'alcool isopropylique avant de cliver. |
| − | + | NB : ne plus toucher avec les doigts la fibre une fois nettoyée. | |
|Step_Picture_00=Fusion_welding_of_optical_fibres_img70.jpg | |Step_Picture_00=Fusion_welding_of_optical_fibres_img70.jpg | ||
|Step_Picture_00_annotation={"version":"2.4.6","objects":[{"type":"image","version":"2.4.6","originX":"left","originY":"top","left":-83,"top":-1,"width":800,"height":438,"fill":"rgb(0,0,0)","stroke":null,"strokeWidth":0,"strokeDashArray":null,"strokeLineCap":"butt","strokeDashOffset":0,"strokeLineJoin":"miter","strokeMiterLimit":4,"scaleX":1.04,"scaleY":1.04,"angle":0,"flipX":false,"flipY":false,"opacity":1,"shadow":null,"visible":true,"clipTo":null,"backgroundColor":"","fillRule":"nonzero","paintFirst":"fill","globalCompositeOperation":"source-over","transformMatrix":null,"skewX":0,"skewY":0,"crossOrigin":"","cropX":0,"cropY":0,"src":"http://demo-master.dokit.io/w/images/5/51/Fusion_welding_of_optical_fibres_img70.jpg","filters":[]}],"height":450,"width":600} | |Step_Picture_00_annotation={"version":"2.4.6","objects":[{"type":"image","version":"2.4.6","originX":"left","originY":"top","left":-83,"top":-1,"width":800,"height":438,"fill":"rgb(0,0,0)","stroke":null,"strokeWidth":0,"strokeDashArray":null,"strokeLineCap":"butt","strokeDashOffset":0,"strokeLineJoin":"miter","strokeMiterLimit":4,"scaleX":1.04,"scaleY":1.04,"angle":0,"flipX":false,"flipY":false,"opacity":1,"shadow":null,"visible":true,"clipTo":null,"backgroundColor":"","fillRule":"nonzero","paintFirst":"fill","globalCompositeOperation":"source-over","transformMatrix":null,"skewX":0,"skewY":0,"crossOrigin":"","cropX":0,"cropY":0,"src":"http://demo-master.dokit.io/w/images/5/51/Fusion_welding_of_optical_fibres_img70.jpg","filters":[]}],"height":450,"width":600} | ||
| Line 42: | Line 42: | ||
}} | }} | ||
{{Tuto Step | {{Tuto Step | ||
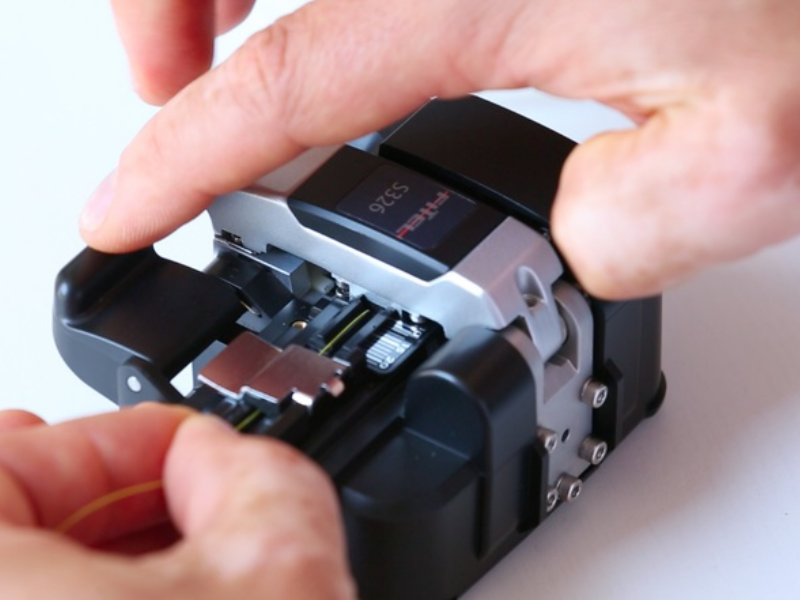
| − | |Step_Title= | + | |Step_Title=Clivage de la fibre |
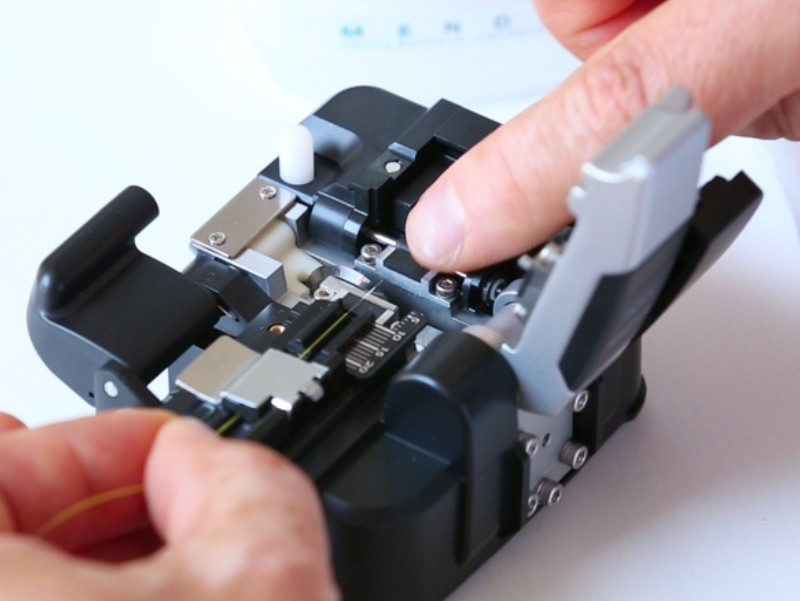
| − | |Step_Content= | + | |Step_Content=Positionner la fibre dans la rainure adaptée du guide fibre (250 ou 900 µm), la gaine 250 ou 900 µm à la graduation 10 en faisant attention que la partie dénuée prenne bien appui sur les 2 patins. |
|Step_Picture_00=Fusion_welding_of_optical_fibres_img76.jpg | |Step_Picture_00=Fusion_welding_of_optical_fibres_img76.jpg | ||
|Step_Picture_00_annotation={"version":"2.4.6","objects":[{"type":"image","version":"2.4.6","originX":"left","originY":"top","left":-114,"top":-1,"width":800,"height":442,"fill":"rgb(0,0,0)","stroke":null,"strokeWidth":0,"strokeDashArray":null,"strokeLineCap":"butt","strokeDashOffset":0,"strokeLineJoin":"miter","strokeMiterLimit":4,"scaleX":1.03,"scaleY":1.03,"angle":0,"flipX":false,"flipY":false,"opacity":1,"shadow":null,"visible":true,"clipTo":null,"backgroundColor":"","fillRule":"nonzero","paintFirst":"fill","globalCompositeOperation":"source-over","transformMatrix":null,"skewX":0,"skewY":0,"crossOrigin":"","cropX":0,"cropY":0,"src":"http://demo-master.dokit.io/w/images/8/8a/Fusion_welding_of_optical_fibres_img76.jpg","filters":[]}],"height":450.5703422053232,"width":600} | |Step_Picture_00_annotation={"version":"2.4.6","objects":[{"type":"image","version":"2.4.6","originX":"left","originY":"top","left":-114,"top":-1,"width":800,"height":442,"fill":"rgb(0,0,0)","stroke":null,"strokeWidth":0,"strokeDashArray":null,"strokeLineCap":"butt","strokeDashOffset":0,"strokeLineJoin":"miter","strokeMiterLimit":4,"scaleX":1.03,"scaleY":1.03,"angle":0,"flipX":false,"flipY":false,"opacity":1,"shadow":null,"visible":true,"clipTo":null,"backgroundColor":"","fillRule":"nonzero","paintFirst":"fill","globalCompositeOperation":"source-over","transformMatrix":null,"skewX":0,"skewY":0,"crossOrigin":"","cropX":0,"cropY":0,"src":"http://demo-master.dokit.io/w/images/8/8a/Fusion_welding_of_optical_fibres_img76.jpg","filters":[]}],"height":450.5703422053232,"width":600} | ||
| Line 50: | Line 50: | ||
}} | }} | ||
{{Tuto Step | {{Tuto Step | ||
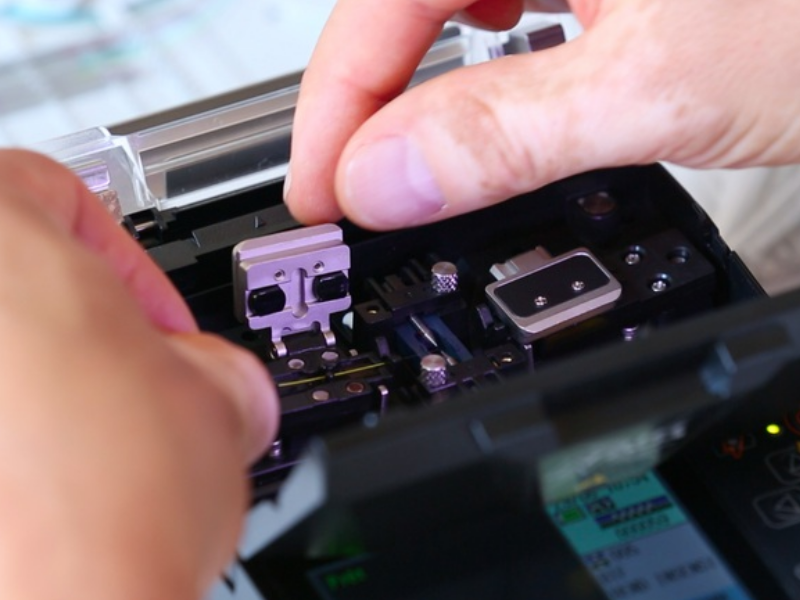
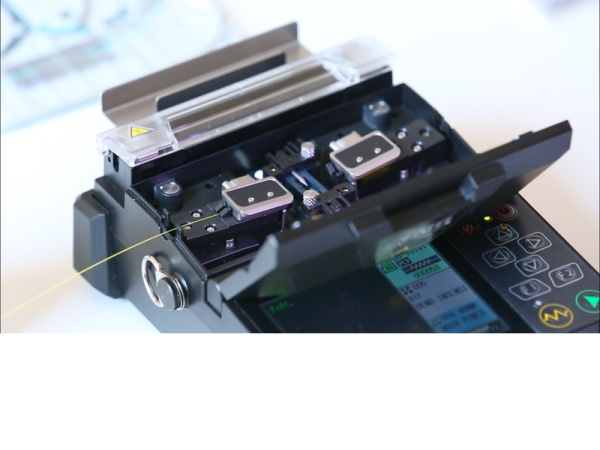
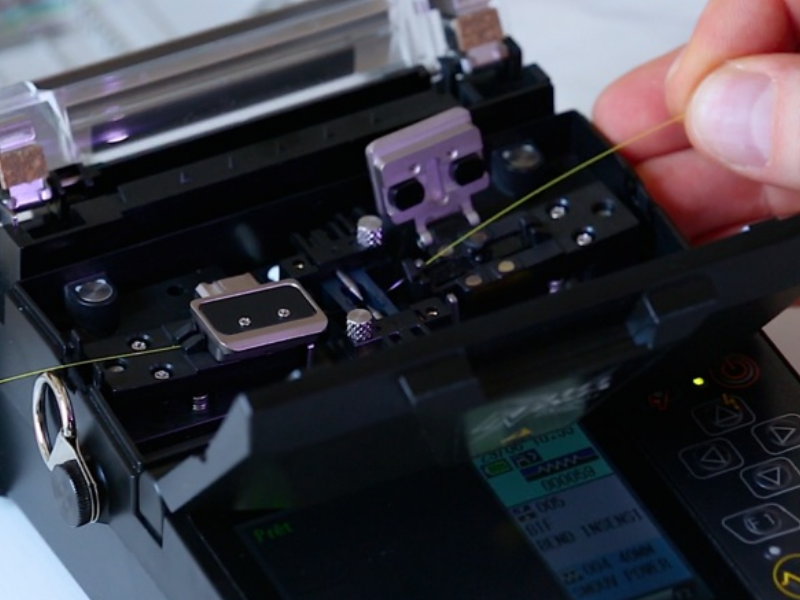
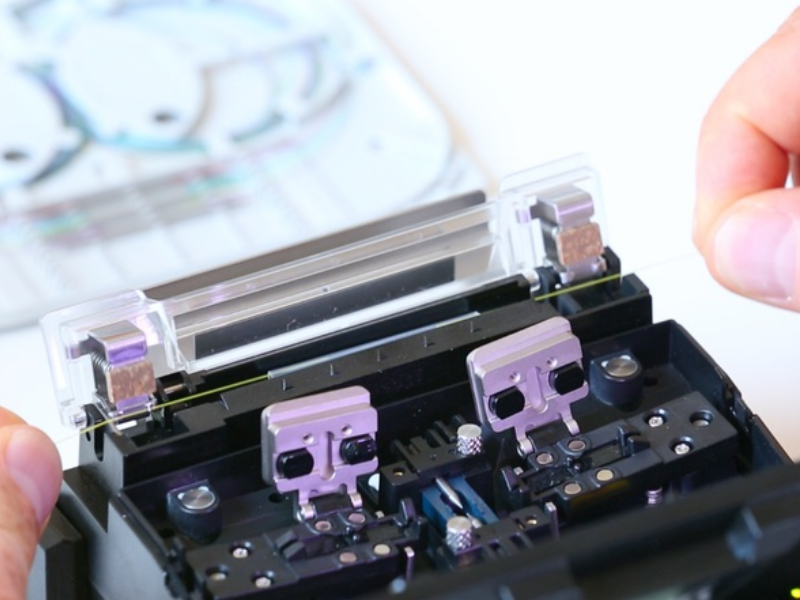
| − | |Step_Title= | + | |Step_Title=Positionnement de la fibre dans la soudeuse |
| − | |Step_Content= | + | |Step_Content=Positionner la fibre dans la soudeuse en plaçant son extrémité entre l'alignement des électrodes et le bord de la gorge en V, fermer le clapet de maintien de la fibre. |
| − | + | NB : Attention de ne pas cogner l'extrémité de la fibre au risque d'altérer la qualité du clivage. | |
| − | + | Vous devez maintenant répéter ces opérations pour la seconde fibre. | |
|Step_Picture_00=Fusion_welding_of_optical_fibres_img98.jpg | |Step_Picture_00=Fusion_welding_of_optical_fibres_img98.jpg | ||
|Step_Picture_00_annotation={"version":"2.4.6","objects":[{"type":"image","version":"2.4.6","originX":"left","originY":"top","left":-53,"top":-1,"width":800,"height":439,"fill":"rgb(0,0,0)","stroke":null,"strokeWidth":0,"strokeDashArray":null,"strokeLineCap":"butt","strokeDashOffset":0,"strokeLineJoin":"miter","strokeMiterLimit":4,"scaleX":1.04,"scaleY":1.04,"angle":0,"flipX":false,"flipY":false,"opacity":1,"shadow":null,"visible":true,"clipTo":null,"backgroundColor":"","fillRule":"nonzero","paintFirst":"fill","globalCompositeOperation":"source-over","transformMatrix":null,"skewX":0,"skewY":0,"crossOrigin":"","cropX":0,"cropY":0,"src":"http://demo-master.dokit.io/w/images/1/19/Fusion_welding_of_optical_fibres_img98.jpg","filters":[]}],"height":450.2879078694818,"width":600} | |Step_Picture_00_annotation={"version":"2.4.6","objects":[{"type":"image","version":"2.4.6","originX":"left","originY":"top","left":-53,"top":-1,"width":800,"height":439,"fill":"rgb(0,0,0)","stroke":null,"strokeWidth":0,"strokeDashArray":null,"strokeLineCap":"butt","strokeDashOffset":0,"strokeLineJoin":"miter","strokeMiterLimit":4,"scaleX":1.04,"scaleY":1.04,"angle":0,"flipX":false,"flipY":false,"opacity":1,"shadow":null,"visible":true,"clipTo":null,"backgroundColor":"","fillRule":"nonzero","paintFirst":"fill","globalCompositeOperation":"source-over","transformMatrix":null,"skewX":0,"skewY":0,"crossOrigin":"","cropX":0,"cropY":0,"src":"http://demo-master.dokit.io/w/images/1/19/Fusion_welding_of_optical_fibres_img98.jpg","filters":[]}],"height":450.2879078694818,"width":600} | ||
| Line 64: | Line 64: | ||
}} | }} | ||
{{Tuto Step | {{Tuto Step | ||
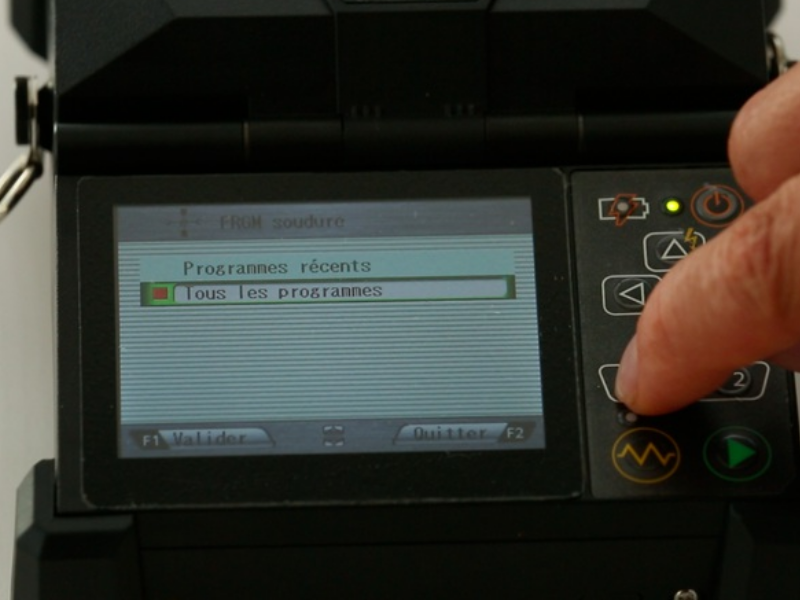
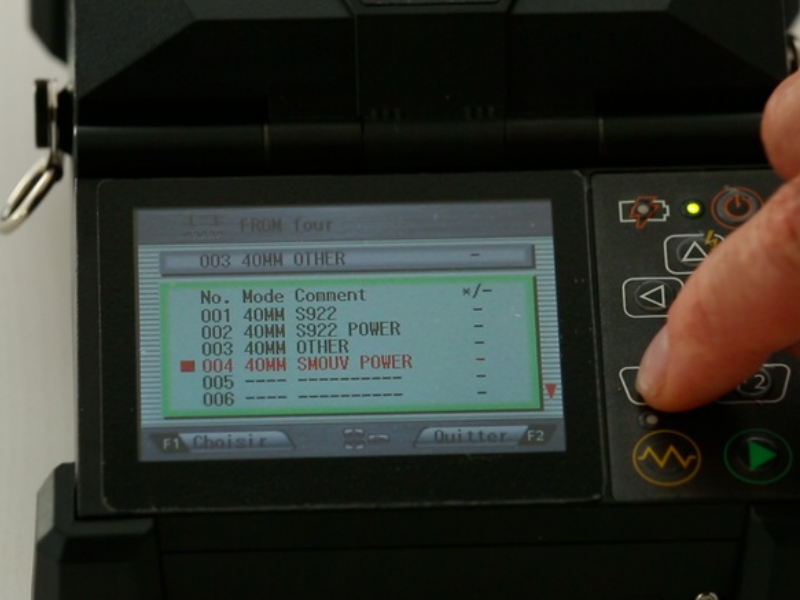
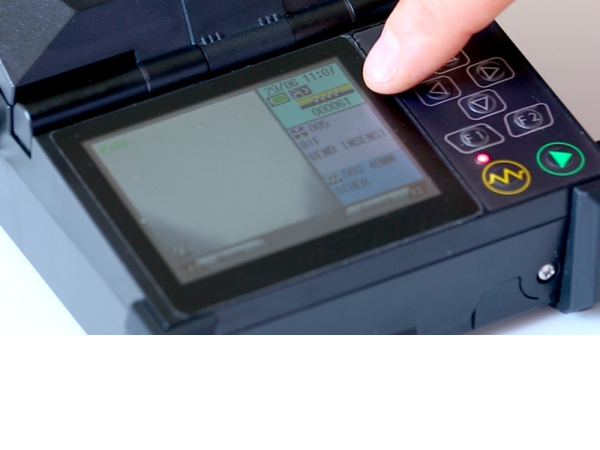
| − | |Step_Title= | + | |Step_Title=Choix des programmes de la soudeuse |
| − | |Step_Content= | + | |Step_Content=Utiliser le programme de soudure adapté au type de fibre à souder, de même que le programme du four adapté au type de smoove utilisé. |
| − | + | Exemple : SM monomode, MM multiomode et BIF monomode G657. | |
|Step_Picture_00=Fusion_welding_of_optical_fibres_img115.jpg | |Step_Picture_00=Fusion_welding_of_optical_fibres_img115.jpg | ||
|Step_Picture_00_annotation={"version":"2.4.6","objects":[{"type":"image","version":"2.4.6","originX":"left","originY":"top","left":-126,"top":-3,"width":800,"height":440,"fill":"rgb(0,0,0)","stroke":null,"strokeWidth":0,"strokeDashArray":null,"strokeLineCap":"butt","strokeDashOffset":0,"strokeLineJoin":"miter","strokeMiterLimit":4,"scaleX":1.04,"scaleY":1.04,"angle":0,"flipX":false,"flipY":false,"opacity":1,"shadow":null,"visible":true,"clipTo":null,"backgroundColor":"","fillRule":"nonzero","paintFirst":"fill","globalCompositeOperation":"source-over","transformMatrix":null,"skewX":0,"skewY":0,"crossOrigin":"","cropX":0,"cropY":0,"src":"http://demo-master.dokit.io/w/images/8/8f/Fusion_welding_of_optical_fibres_img115.jpg","filters":[]}],"height":449.71098265895955,"width":600} | |Step_Picture_00_annotation={"version":"2.4.6","objects":[{"type":"image","version":"2.4.6","originX":"left","originY":"top","left":-126,"top":-3,"width":800,"height":440,"fill":"rgb(0,0,0)","stroke":null,"strokeWidth":0,"strokeDashArray":null,"strokeLineCap":"butt","strokeDashOffset":0,"strokeLineJoin":"miter","strokeMiterLimit":4,"scaleX":1.04,"scaleY":1.04,"angle":0,"flipX":false,"flipY":false,"opacity":1,"shadow":null,"visible":true,"clipTo":null,"backgroundColor":"","fillRule":"nonzero","paintFirst":"fill","globalCompositeOperation":"source-over","transformMatrix":null,"skewX":0,"skewY":0,"crossOrigin":"","cropX":0,"cropY":0,"src":"http://demo-master.dokit.io/w/images/8/8f/Fusion_welding_of_optical_fibres_img115.jpg","filters":[]}],"height":449.71098265895955,"width":600} | ||
| Line 80: | Line 80: | ||
}} | }} | ||
{{Tuto Step | {{Tuto Step | ||
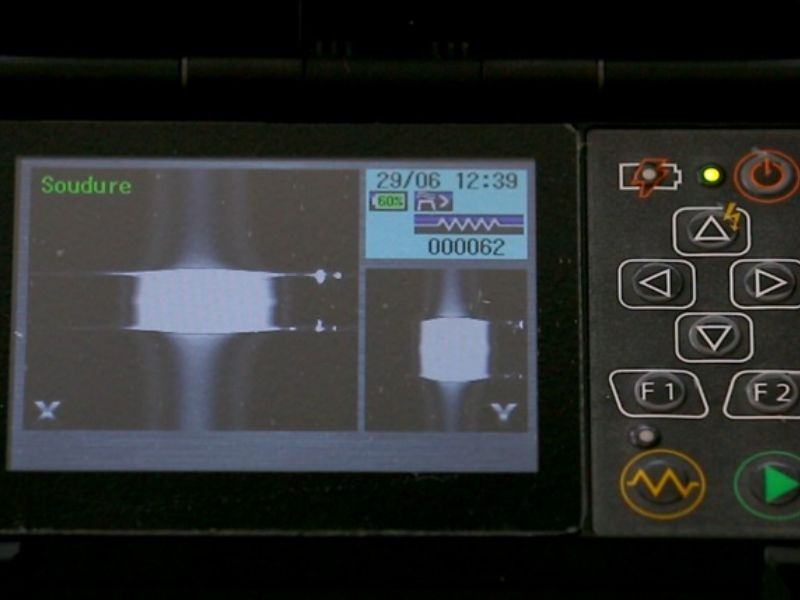
| − | |Step_Title= | + | |Step_Title=Réalisation de la soudure |
| − | |Step_Content= | + | |Step_Content=Fermer le capot pour déclencher le processus de soudure (la fonction démarrage auto doit être activée sinon appuyer sur la flèche verte du clavier). |
|Step_Picture_00=Fusion_welding_of_optical_fibres_img137.jpg | |Step_Picture_00=Fusion_welding_of_optical_fibres_img137.jpg | ||
|Step_Picture_00_annotation={"version":"2.4.6","objects":[{"type":"image","version":"2.4.6","originX":"left","originY":"top","left":-65,"top":-5,"width":800,"height":446,"fill":"rgb(0,0,0)","stroke":null,"strokeWidth":0,"strokeDashArray":null,"strokeLineCap":"butt","strokeDashOffset":0,"strokeLineJoin":"miter","strokeMiterLimit":4,"scaleX":1.02,"scaleY":1.02,"angle":0,"flipX":false,"flipY":false,"opacity":1,"shadow":null,"visible":true,"clipTo":null,"backgroundColor":"","fillRule":"nonzero","paintFirst":"fill","globalCompositeOperation":"source-over","transformMatrix":null,"skewX":0,"skewY":0,"crossOrigin":"","cropX":0,"cropY":0,"src":"http://demo-master.dokit.io/w/images/f/f5/Fusion_welding_of_optical_fibres_img137.jpg","filters":[]}],"height":450,"width":600} | |Step_Picture_00_annotation={"version":"2.4.6","objects":[{"type":"image","version":"2.4.6","originX":"left","originY":"top","left":-65,"top":-5,"width":800,"height":446,"fill":"rgb(0,0,0)","stroke":null,"strokeWidth":0,"strokeDashArray":null,"strokeLineCap":"butt","strokeDashOffset":0,"strokeLineJoin":"miter","strokeMiterLimit":4,"scaleX":1.02,"scaleY":1.02,"angle":0,"flipX":false,"flipY":false,"opacity":1,"shadow":null,"visible":true,"clipTo":null,"backgroundColor":"","fillRule":"nonzero","paintFirst":"fill","globalCompositeOperation":"source-over","transformMatrix":null,"skewX":0,"skewY":0,"crossOrigin":"","cropX":0,"cropY":0,"src":"http://demo-master.dokit.io/w/images/f/f5/Fusion_welding_of_optical_fibres_img137.jpg","filters":[]}],"height":450,"width":600} | ||
| Line 90: | Line 90: | ||
}} | }} | ||
{{Tuto Step | {{Tuto Step | ||
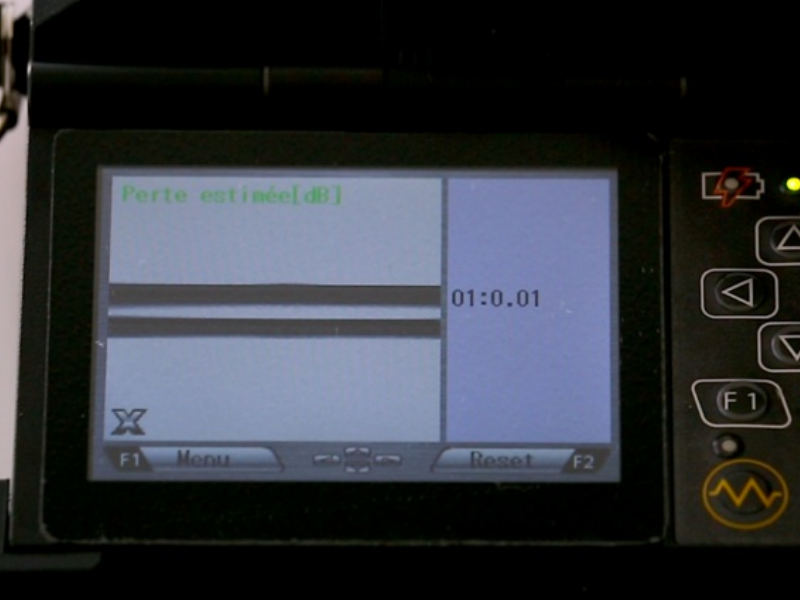
| − | |Step_Title= | + | |Step_Title=Evaluation de la soudure |
| − | |Step_Content= | + | |Step_Content=Trois critères d'évaluation sont à observer : la qualité de l'image des fibres soudées (bon alignement des cœurs, absence de poussière ou de bulle d'air etc...), l'estimation de la perte donnée par la machine et la résistance de la fibre au test de traction (à ne pas désactiver). |
|Step_Picture_00=Fusion_welding_of_optical_fibres_img143.jpg | |Step_Picture_00=Fusion_welding_of_optical_fibres_img143.jpg | ||
|Step_Picture_00_annotation={"version":"2.4.6","objects":[{"type":"image","version":"2.4.6","originX":"left","originY":"top","left":-83,"top":-2,"width":800,"height":433,"fill":"rgb(0,0,0)","stroke":null,"strokeWidth":0,"strokeDashArray":null,"strokeLineCap":"butt","strokeDashOffset":0,"strokeLineJoin":"miter","strokeMiterLimit":4,"scaleX":1.06,"scaleY":1.06,"angle":0,"flipX":false,"flipY":false,"opacity":1,"shadow":null,"visible":true,"clipTo":null,"backgroundColor":"","fillRule":"nonzero","paintFirst":"fill","globalCompositeOperation":"source-over","transformMatrix":null,"skewX":0,"skewY":0,"crossOrigin":"","cropX":0,"cropY":0,"src":"http://demo-master.dokit.io/w/images/2/21/Fusion_welding_of_optical_fibres_img143.jpg","filters":[]}],"height":449.706457925636,"width":600} | |Step_Picture_00_annotation={"version":"2.4.6","objects":[{"type":"image","version":"2.4.6","originX":"left","originY":"top","left":-83,"top":-2,"width":800,"height":433,"fill":"rgb(0,0,0)","stroke":null,"strokeWidth":0,"strokeDashArray":null,"strokeLineCap":"butt","strokeDashOffset":0,"strokeLineJoin":"miter","strokeMiterLimit":4,"scaleX":1.06,"scaleY":1.06,"angle":0,"flipX":false,"flipY":false,"opacity":1,"shadow":null,"visible":true,"clipTo":null,"backgroundColor":"","fillRule":"nonzero","paintFirst":"fill","globalCompositeOperation":"source-over","transformMatrix":null,"skewX":0,"skewY":0,"crossOrigin":"","cropX":0,"cropY":0,"src":"http://demo-master.dokit.io/w/images/2/21/Fusion_welding_of_optical_fibres_img143.jpg","filters":[]}],"height":449.706457925636,"width":600} | ||
| Line 100: | Line 100: | ||
}} | }} | ||
{{Tuto Step | {{Tuto Step | ||
| − | |Step_Title= | + | |Step_Title=Positionnement du smoove et rétreint |
| − | |Step_Content= | + | |Step_Content=Avant ouverture du capot, rapprocher le smoove au plus près de la soudeuse, le centrer au niveau de la soudure en s'assurant que le rétreint se fera bien sur les gaines de protection des fibres et non sur la fibre nue. Positionner ainsi le smoove au centre du four. L'activation du four se fait automatiquement si cette fonction a été préalablement sélectionnée dans les paramètres de la machine sinon appuyer sur la résistance jaune du clavier. |
<br /> | <br /> | ||
| Line 116: | Line 116: | ||
}} | }} | ||
{{Tuto Step | {{Tuto Step | ||
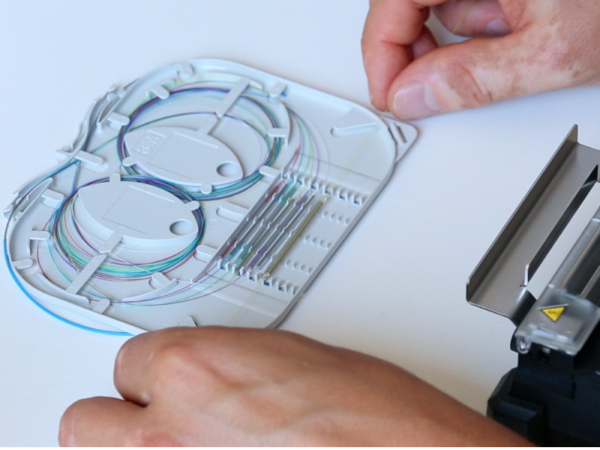
| − | |Step_Title= | + | |Step_Title=Positionnement du smoove sur cassette en vue du lovage |
| − | |Step_Content= | + | |Step_Content=A l'issue du rétreint, positionner le smoove sur le plateau de refroidissement avant de passer à la soudure d'autres fibres. Ensuite positionner les smooves dans la cassette et procéder au lovage des fibres. |
|Step_Picture_00=Fusion_welding_of_optical_fibres_img186.jpg | |Step_Picture_00=Fusion_welding_of_optical_fibres_img186.jpg | ||
|Step_Picture_00_annotation={"version":"2.4.6","objects":[{"type":"image","version":"2.4.6","originX":"left","originY":"top","left":-55,"top":-1,"width":800,"height":549,"fill":"rgb(0,0,0)","stroke":null,"strokeWidth":0,"strokeDashArray":null,"strokeLineCap":"butt","strokeDashOffset":0,"strokeLineJoin":"miter","strokeMiterLimit":4,"scaleX":0.82,"scaleY":0.82,"angle":0,"flipX":false,"flipY":false,"opacity":1,"shadow":null,"visible":true,"clipTo":null,"backgroundColor":"","fillRule":"nonzero","paintFirst":"fill","globalCompositeOperation":"source-over","transformMatrix":null,"skewX":0,"skewY":0,"crossOrigin":"","cropX":0,"cropY":0,"src":"http://demo-master.dokit.io/w/images/6/6c/Fusion_welding_of_optical_fibres_img186.jpg","filters":[]}],"height":449.7709923664122,"width":600} | |Step_Picture_00_annotation={"version":"2.4.6","objects":[{"type":"image","version":"2.4.6","originX":"left","originY":"top","left":-55,"top":-1,"width":800,"height":549,"fill":"rgb(0,0,0)","stroke":null,"strokeWidth":0,"strokeDashArray":null,"strokeLineCap":"butt","strokeDashOffset":0,"strokeLineJoin":"miter","strokeMiterLimit":4,"scaleX":0.82,"scaleY":0.82,"angle":0,"flipX":false,"flipY":false,"opacity":1,"shadow":null,"visible":true,"clipTo":null,"backgroundColor":"","fillRule":"nonzero","paintFirst":"fill","globalCompositeOperation":"source-over","transformMatrix":null,"skewX":0,"skewY":0,"crossOrigin":"","cropX":0,"cropY":0,"src":"http://demo-master.dokit.io/w/images/6/6c/Fusion_welding_of_optical_fibres_img186.jpg","filters":[]}],"height":449.7709923664122,"width":600} | ||
Latest revision as of 15:32, 7 June 2019
Contents
- 1 Items
- 2 Step 1 - Préparation des accessoires
- 3 Step 2 - Dénudage et nettoyage de la fibre
- 4 Step 3 - Clivage de la fibre
- 5 Step 4 - Positionnement de la fibre dans la soudeuse
- 6 Step 5 - Choix des programmes de la soudeuse
- 7 Step 6 - Réalisation de la soudure
- 8 Step 7 - Evaluation de la soudure
- 9 Step 8 - Positionnement du smoove et rétreint
- 10 Step 9 - Positionnement du smoove sur cassette en vue du lovage
- 11 Comments
- Items
Items
Step 1 - Préparation des accessoires
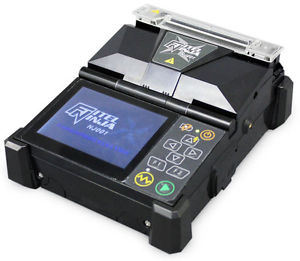
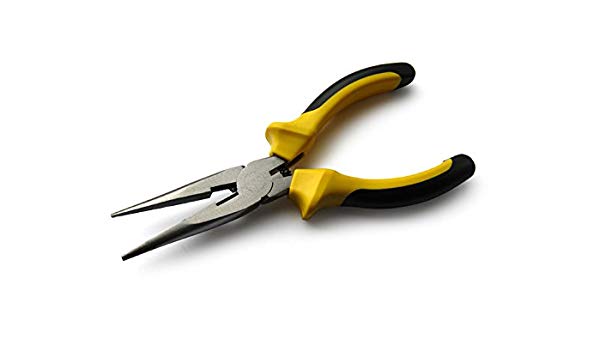
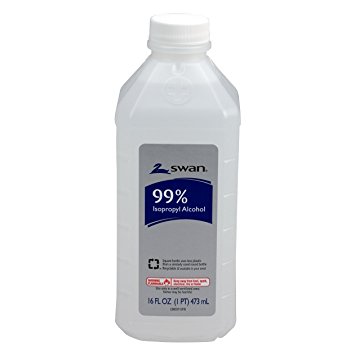
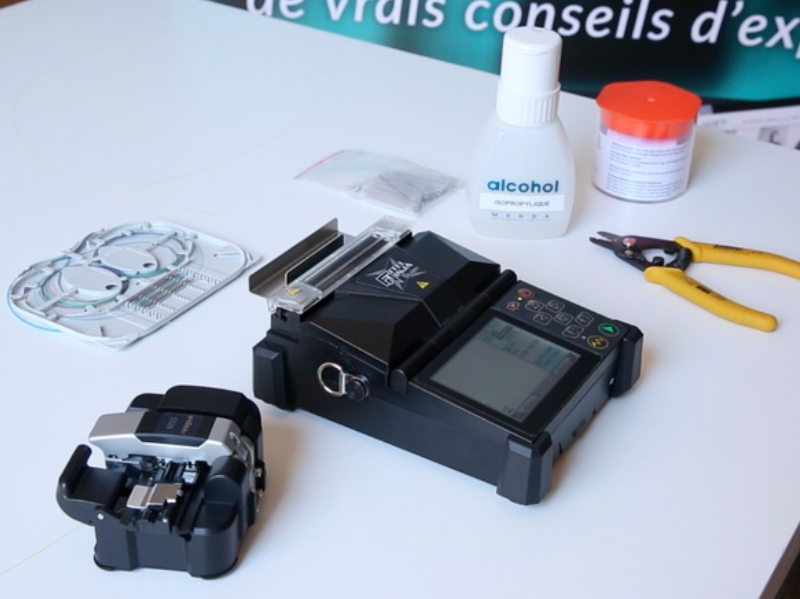
Matériel nécessaire : soudeuse, cliveuse, pince à dénuder, lingettes non pelucheuses, alcool isopropylique et protections d'épissure thermorétractables (smooves).
Step 2 - Dénudage et nettoyage de la fibre
Dénuder sur 3/4 cm, nettoyer la fibre dénudée avec l'alcool isopropylique avant de cliver.
NB : ne plus toucher avec les doigts la fibre une fois nettoyée.
Step 3 - Clivage de la fibre
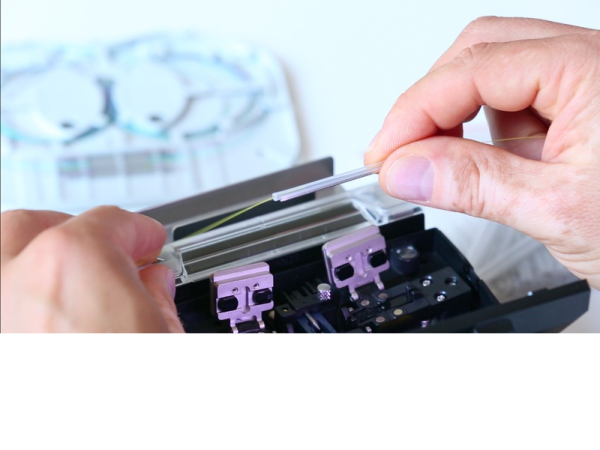
Positionner la fibre dans la rainure adaptée du guide fibre (250 ou 900 µm), la gaine 250 ou 900 µm à la graduation 10 en faisant attention que la partie dénuée prenne bien appui sur les 2 patins.
Step 4 - Positionnement de la fibre dans la soudeuse
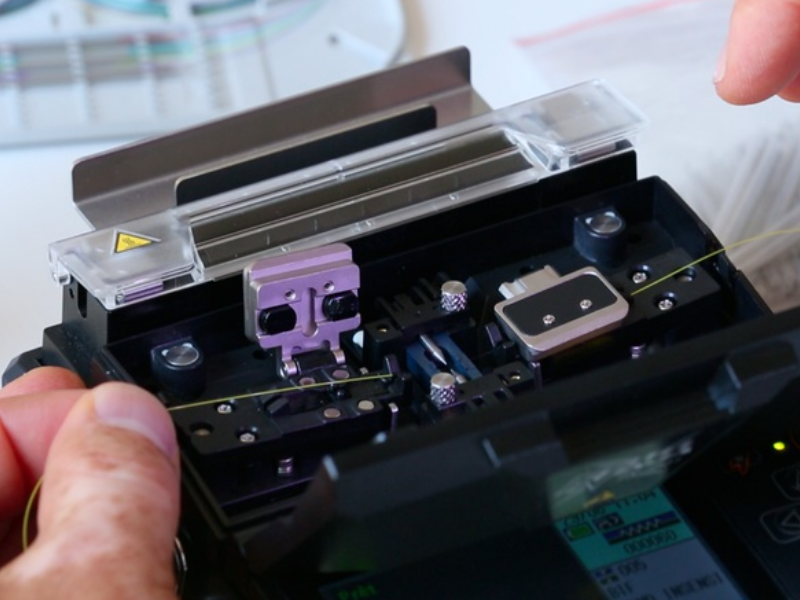
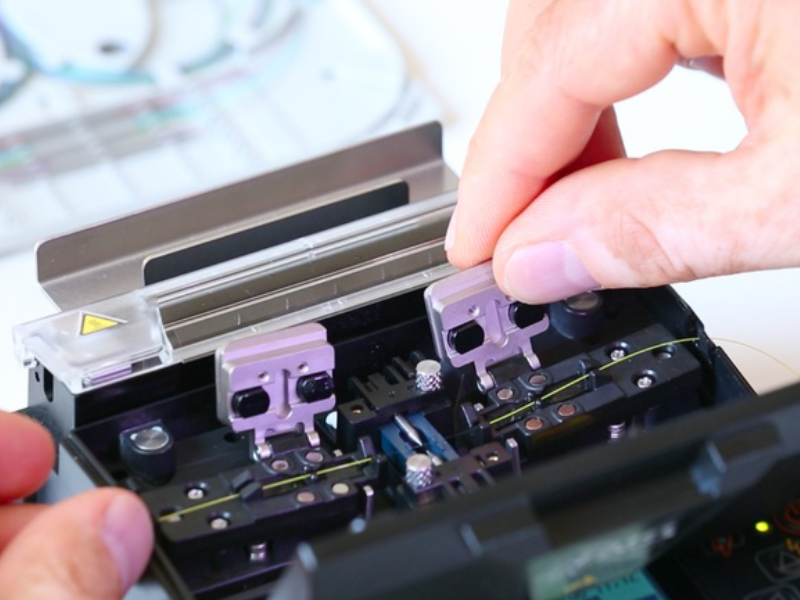
Positionner la fibre dans la soudeuse en plaçant son extrémité entre l'alignement des électrodes et le bord de la gorge en V, fermer le clapet de maintien de la fibre.
NB : Attention de ne pas cogner l'extrémité de la fibre au risque d'altérer la qualité du clivage.
Vous devez maintenant répéter ces opérations pour la seconde fibre.
Step 5 - Choix des programmes de la soudeuse
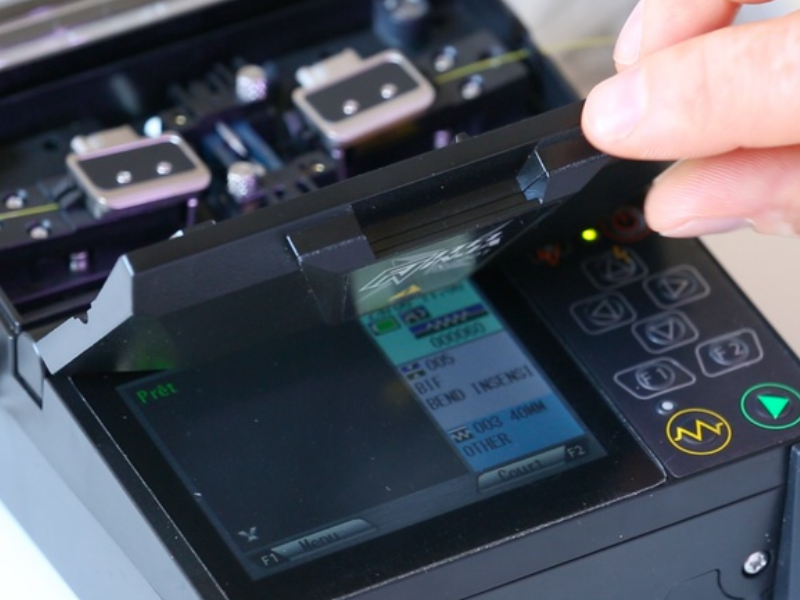
Utiliser le programme de soudure adapté au type de fibre à souder, de même que le programme du four adapté au type de smoove utilisé.
Exemple : SM monomode, MM multiomode et BIF monomode G657.
Step 6 - Réalisation de la soudure
Fermer le capot pour déclencher le processus de soudure (la fonction démarrage auto doit être activée sinon appuyer sur la flèche verte du clavier).
Step 7 - Evaluation de la soudure
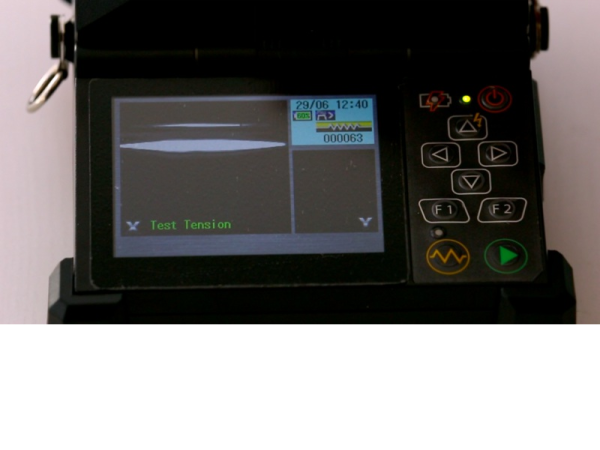
Trois critères d'évaluation sont à observer : la qualité de l'image des fibres soudées (bon alignement des cœurs, absence de poussière ou de bulle d'air etc...), l'estimation de la perte donnée par la machine et la résistance de la fibre au test de traction (à ne pas désactiver).
Step 8 - Positionnement du smoove et rétreint
Avant ouverture du capot, rapprocher le smoove au plus près de la soudeuse, le centrer au niveau de la soudure en s'assurant que le rétreint se fera bien sur les gaines de protection des fibres et non sur la fibre nue. Positionner ainsi le smoove au centre du four. L'activation du four se fait automatiquement si cette fonction a été préalablement sélectionnée dans les paramètres de la machine sinon appuyer sur la résistance jaune du clavier.
Step 9 - Positionnement du smoove sur cassette en vue du lovage
A l'issue du rétreint, positionner le smoove sur le plateau de refroidissement avant de passer à la soudure d'autres fibres. Ensuite positionner les smooves dans la cassette et procéder au lovage des fibres.
Published








 Français
 English
 Deutsch
 Español
 Italiano
 Português