| [unchecked revision] | [unchecked revision] |
(Page créée avec « Make a notching and a sheet bending ») |
(Mise à jour pour être en accord avec la nouvelle version de la source de la page) |
||
| (10 intermediate revisions by 2 users not shown) | |||
| Line 1: | Line 1: | ||
{{Tuto Details | {{Tuto Details | ||
| − | |||
| − | |||
| − | |||
|Main_Picture=Encochage_de_tôle_main.jpg | |Main_Picture=Encochage_de_tôle_main.jpg | ||
|Description=Make a notching and a sheet bending | |Description=Make a notching and a sheet bending | ||
| − | | | + | |Categories=Onboarding, Work instructions |
| − | |||
|Difficulty=Very easy | |Difficulty=Very easy | ||
|Duration=5 | |Duration=5 | ||
|Duration-type=minute(s) | |Duration-type=minute(s) | ||
| + | |Area=Production | ||
| + | |Business=Industrial | ||
|Tags=Encochage, Machine, | |Tags=Encochage, Machine, | ||
| − | |||
| − | |||
| − | |||
| − | |||
}} | }} | ||
{{Introduction | {{Introduction | ||
| Line 20: | Line 14: | ||
}} | }} | ||
{{Materials | {{Materials | ||
| − | | | + | |ItemList={{ItemList |
| − | | | + | |Item=Punching machine |
| − | + | }} | |
| − | |||
}} | }} | ||
{{Separator}} | {{Separator}} | ||
{{Tuto Step | {{Tuto Step | ||
| + | |Step_Title=Position your sheet metal plate on the punching machine | ||
| + | |Step_Content= | ||
|Step_Picture_00=Encochage_de_tôle_Step_01.jpg | |Step_Picture_00=Encochage_de_tôle_Step_01.jpg | ||
|Step_Picture_01=Encochage_de_tôle_Step_02.jpg | |Step_Picture_01=Encochage_de_tôle_Step_02.jpg | ||
| − | |||
| − | |||
}} | }} | ||
{{Tuto Step | {{Tuto Step | ||
| + | |Step_Title=Start the notching operation | ||
| + | |Step_Content=* Adjust the punch angle using the notching die | ||
| + | * Click the ON key to start the machine | ||
|Step_Picture_00=Encochage_de_tôle_Step_03.jpg | |Step_Picture_00=Encochage_de_tôle_Step_03.jpg | ||
|Step_Picture_01=Encochage_de_tôle_Step_04.jpg | |Step_Picture_01=Encochage_de_tôle_Step_04.jpg | ||
| − | |||
| − | |||
| − | |||
}} | }} | ||
{{Tuto Step | {{Tuto Step | ||
| + | |Step_Title=Fold the plate | ||
| + | |Step_Content=* Set the folding die and start folding the plate | ||
|Step_Picture_00=Encochage_de_tôle_Step_05.jpg | |Step_Picture_00=Encochage_de_tôle_Step_05.jpg | ||
| − | |||
| − | |||
}} | }} | ||
{{Tuto Step | {{Tuto Step | ||
| + | |Step_Title=Check the fold obtained | ||
| + | |Step_Content= | ||
|Step_Picture_00=Encochage_de_tôle_Step_06.jpg | |Step_Picture_00=Encochage_de_tôle_Step_06.jpg | ||
| − | |||
| − | |||
}} | }} | ||
| − | {{Notes | + | {{Notes}} |
| − | | | + | {{PageLang |
| + | |Language=en | ||
| + | |SourceLanguage=fr | ||
| + | |IsTranslation=1 | ||
}} | }} | ||
{{Tuto Status | {{Tuto Status | ||
|Complete=Published | |Complete=Published | ||
}} | }} | ||
Latest revision as of 17:31, 29 April 2019
Make a notching and a sheet bending


Difficulty
Very easy
Duration
5 minute(s)
Area
Production
Business
Industrial
Introduction
L'encochage est un procédé de cisaillage effectué simultanément par deux lames qui forment un angle généralement réglable. Sur l'encocheuse, on peut ainsi effectuer des coupes angulaires dans les coins des tôles ou sur les cotés. Les angles peuvent varier de environ 10° à presque 180° suivant les encocheuses utilisées. On utilise souvent l'encochage avant le pliage, car il permet d'effectuer des flans développés plus évolués pour des pièces pliées avec une valeur ajoutée plus intéressante.
- Items
Items
Punching machine 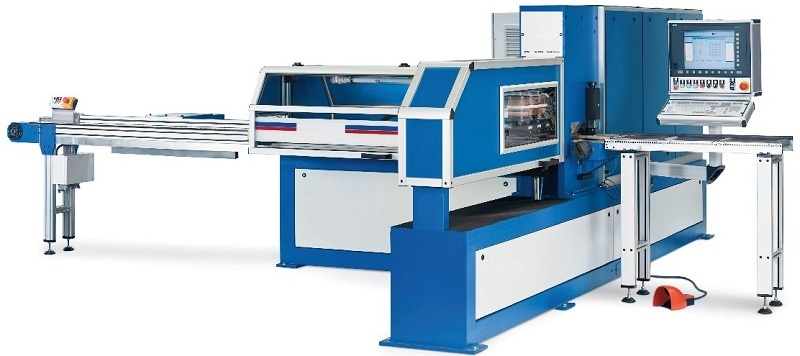

A punching machine is a machine tool for punching and embossing flat sheet-materials to produce form-features needed as mechanical element and/or to extend static stability of a sheet section.
Step 1 - Position your sheet metal plate on the punching machine


Step 2 - Start the notching operation
- Adjust the punch angle using the notching die
- Click the ON key to start the machine


Step 3 - Fold the plate
- Set the folding die and start folding the plate

Step 4 - Check the fold obtained

Published
 Français
 English
 Deutsch
 Español
 Italiano
 Português